Documentation Index
Fetch the complete documentation index at: https://upstash.com/docs/llms.txt
Use this file to discover all available pages before exploring further.
Deny List
Imagine that you want to block requests from certain countries or from some
user agents. In this case, you can make use of deny lists introduced in
ratelimit version 1.2.1.
Deny lists allow you to block based on IP addresses, user agents, countries
and identifiers.
To enable checking the deny list in your Ratelimit client, simply pass
enableProtection as true:
const ratelimit = new Ratelimit({
redis: Redis.fromEnv(),
limiter: Ratelimit.slidingWindow(10, "10 s"),
enableProtection: true
analytics: true,
});
When limit is called, the client will check whether any of these values
are in the deny list and block the request if so.
const { success, pending, reason, deniedValue } = ratelimit.limit("userId", {
ip: "ip-address",
userAgent: "user-agent",
country: "country",
});
await pending; // await pending if you have analytics enabled
console.log(success, reason, deniedValue);
// prints: false, "denyList", "ip-address"
If a request fails because a value was in deny list, reason field will
be "denyList". deniedValue will contain the value in the deny list.
See limit method
for more detailts.
Client also keeps a cache of denied values. When a value is found
in the deny list, the client stores this value in the cache. If this value
is encountered in the following requests, it is denied without calling
Redis at all. Items are stored in the cache for a minute. This means that if
you add a new value to the deny list, it will immediately take affect but when you
remove a value, it can take up to a minute for clients to start
accepting the value. This can significantly reduce the number of calls to Redis.
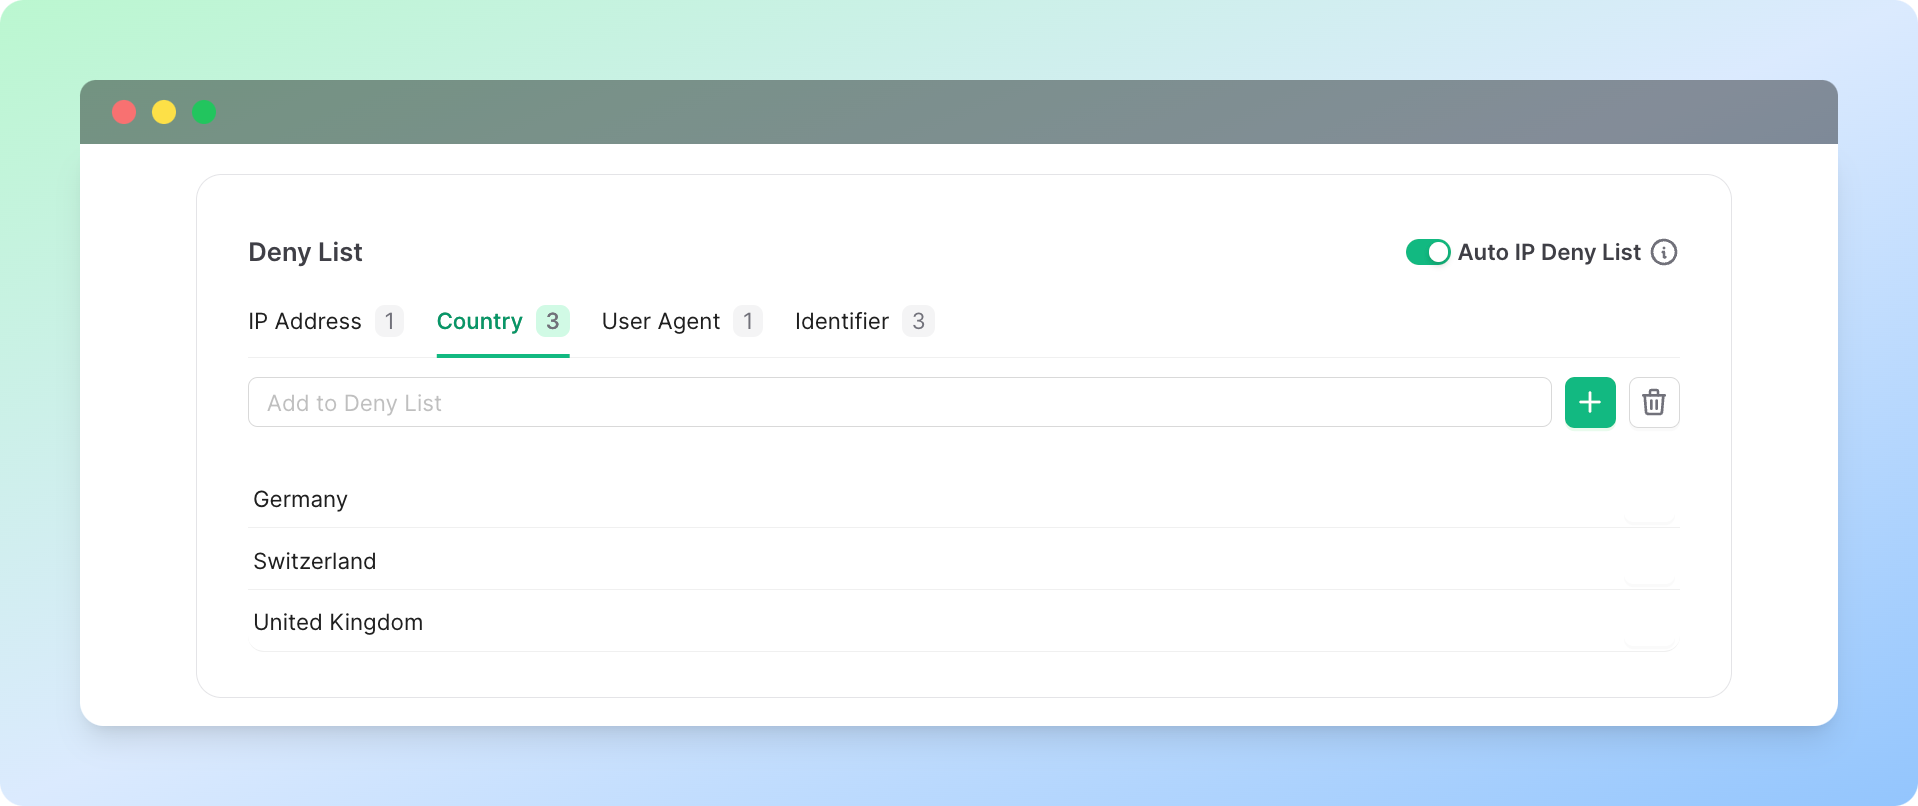
Contents of the deny lists are managed from the Ratelimit Dashboard.
You can use the dashboard to add items to the deny list or remove them.
If you have analytics enabled, you can also view the number of denied
requests per country/ip address/user agent/identifier on the dashboard.
Note that we look for exact match when checking a value to see if it’s in
the deny lists. Pattern matching is not supported.
Auto IP Deny List
The Auto IP Deny List feature enables the automatic blocking of IP addresses
identified as malicious through open-source IP deny lists. This functionality
uses the ipsum repository on GitHub,
which aggregates data from over 30 different deny lists.
To enable protection, set the enableProtection parameter to true. Once activated,
your SDK will automatically block IP addresses by leveraging the IP deny lists
when you provide the request IPs in the limit method.
const ratelimit = new Ratelimit({
redis: Redis.fromEnv(),
limiter: Ratelimit.slidingWindow(10, "10 s"),
enableProtection: true,
});
The IP deny list is updated daily at 2 AM UTC. Upon expiration, the
first call to limit after 2 AM UTC will trigger an update, downloading
the latest IPs from GitHub and refreshing the list in your Redis
instance. The update process occurs asynchronously, allowing you to
return the result to the user while the IP list updates in the
background. To ensure the update completes successfully, utilize the
pending field:
const { success, pending } = await ratelimit.limit(
content,
{ip: "ip-address"}
);
await pending;
For more information on effectively using pending, refer to the
“Asynchronous synchronization between databases” section.
Blocked IPs will be listed in the “Denied” section of the Ratelimit
dashboard, providing a clear overview of the addresses that have
been automatically blocked.
If you prefer to disable the Auto IP Deny List feature while still
using the deny lists, you can do so via the Ratelimit dashboard on
the Upstash Console.